Getting Started
Getting started
This page describes what you will actually see during onboarding (the guided setup), the choices you’ll be offered, and what’s available immediately after you finish.
Quick start (TL;DR)
- Choose a plan and create your organization.
- Set up org structure: Automated (recommended) or Manual.
- Invite members (one by one or bulk via CSV) — or skip.
- Add tools to build your inventory (catalog, URL, or manual) — or skip.
- Review assignments and finish onboarding to enter the app dashboard.
Before you begin
- Decide who should be an admin vs a member (you can invite both).
- If you plan to import org structure, have access to your directory system ready.
- Make a short list of your most important tools to add first.
Step 1 of 5 — Choose a plan and create your organization
- You’ll see a plan selector and a button to create your organization.
- A free trial badge is shown during onboarding (trial time remaining is visible in the onboarding header).
- If an organization already exists for your email domain, you’ll be shown the domain and an option to request access (or contact the owner/support).
Step 2 of 5 — Org structure
- You’ll be asked to choose one option to continue (you can switch later):
- Automated (recommended): connect Google Workspace, Microsoft Entra, or SCIM to import departments, teams, and users.
- Manual: build your org structure directly on the diagram (departments and teams).
- If you import from a directory, you can preview what will be created and choose whether invites are sent from the import flow.
Step 3 of 5 — Invite members
- You’ll see “Invite members” with two options (you can switch later):
- Invite one by one: send individual invites and keep adding more.
- Bulk invite (CSV): upload/paste a CSV to invite many teammates at once.
- You can also skip invites during onboarding and continue.
Step 4 of 5 — Add tools
- You’ll see “Add tools” with three options (you can switch later):
- Search catalog (recommended): pick from the tool catalog and add with one click.
- Add via URL: paste a tool website and CleverOps enriches it automatically.
- Add manually: for internal apps or uncommon tools.
- You can skip adding tools during onboarding and continue.
Step 5 of 5 — Assignments and finish
- You’ll review assignments (for example, which departments/teams a tool belongs to) and then finish onboarding.
- When you finish, CleverOps redirects you into the app dashboard.
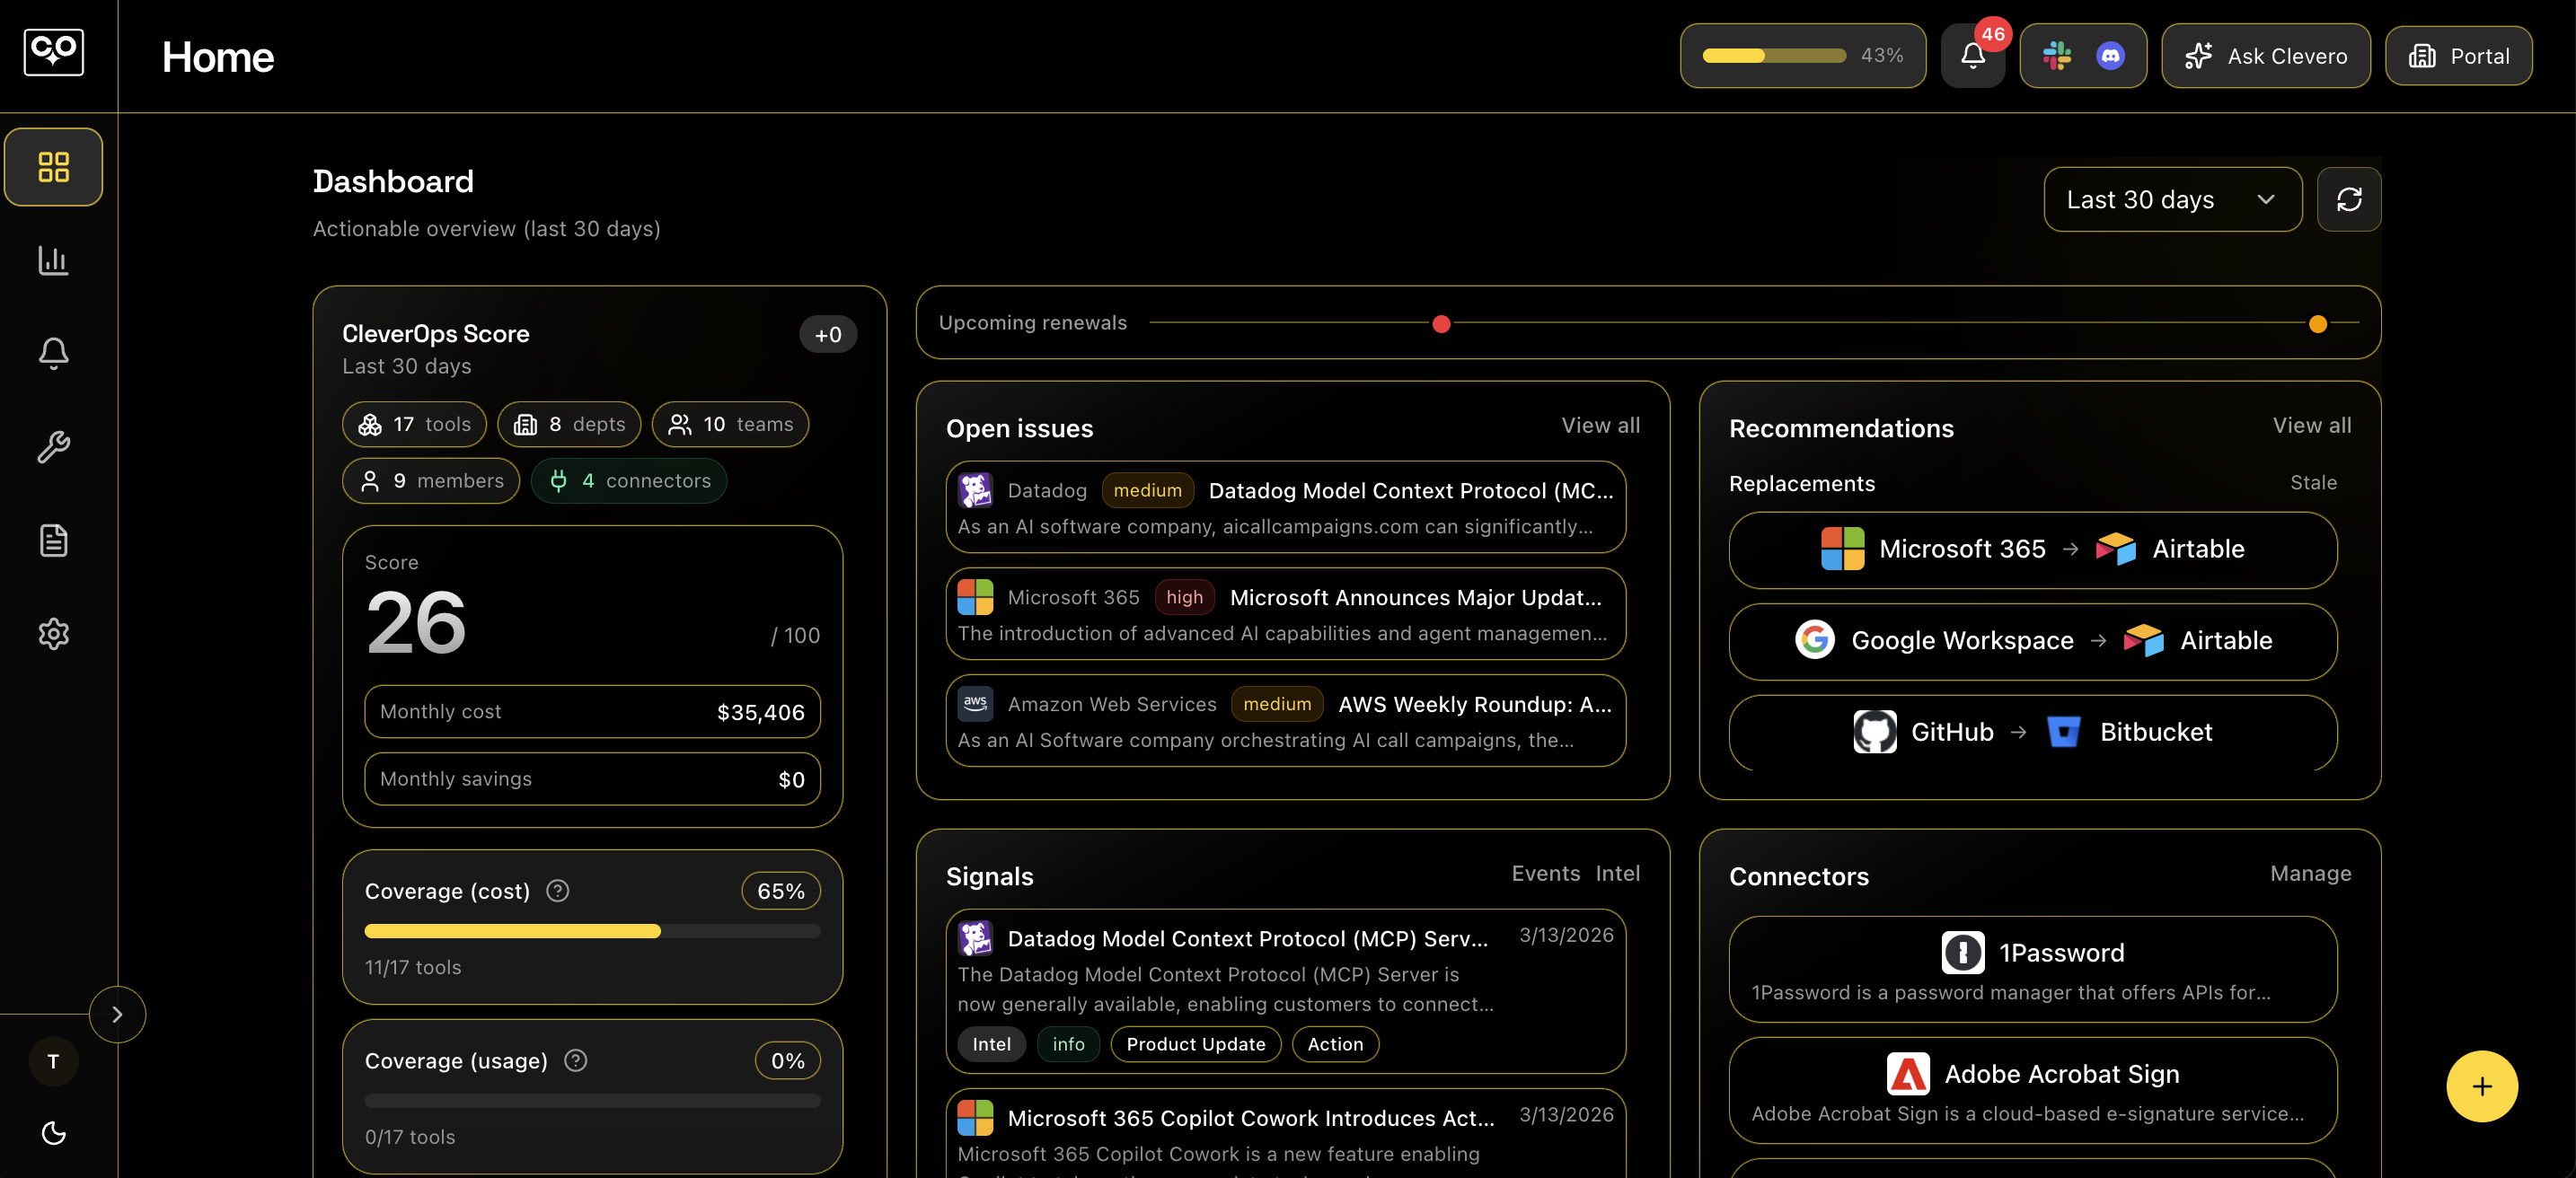
What you’ll see after onboarding
- Dashboard (command center): summary KPIs plus Signals (Issues/Events/Intelligence) and connectors/tools snapshots.
- Analytics: dashboards that reflect your inventory and connection status (including a connectors health view).
- Inventory: tools list plus org structure (departments, teams, members) you created or imported during onboarding.
- Settings → Integrations: connect providers and manage directory sync, connections, and errors.
- Settings → AI Agents / MCP: create API keys so external clients (IDEs and agent tools) can access your workspace via MCP. SeeAI Agents / MCP.
- Portal / Portal Admin: publish portal content, announcements, quick links, and access links.
Get a 15-minute walkthrough.
See how CleverOps inventories tools, monitors usage and renewals, and produces exportable reports.
© 2026 CleverOps. All rights reserved.